Master the Perfect Beachy Waves and Loose Curls Hairstyle: Your Ultimate Guide to Effortless Summer Hair
Learn how to create stunning beachy waves and loose curls with expert techniques, tools, and styling tips for all hair types. Get salon-quality results at home.
Picture this: you wake up looking like you just stepped off a sun-soaked beach in Malibu, your hair cascading in perfect, tousled waves that seem to have been kissed by ocean breeze and styled by nature itself. The beachy waves and loose curls hairstyle has become the epitome of effortless beauty, capturing hearts from Instagram feeds to red carpets worldwide. This coveted look promises the perfect balance of casual sophistication and carefree charm that works whether you’re grabbing coffee on a Tuesday morning or attending a sunset wedding on the coast.
But here’s the secret that professional stylists don’t want you to know: achieving this seemingly effortless beachy waves and loose curls hairstyle doesn’t require a trip to the salon or hours of complicated styling. With the right techniques, tools, and insider knowledge, you can master this timeless look from the comfort of your own home, regardless of your natural hair texture or styling experience.
Understanding the Beachy Waves and Loose Curls Hairstyle

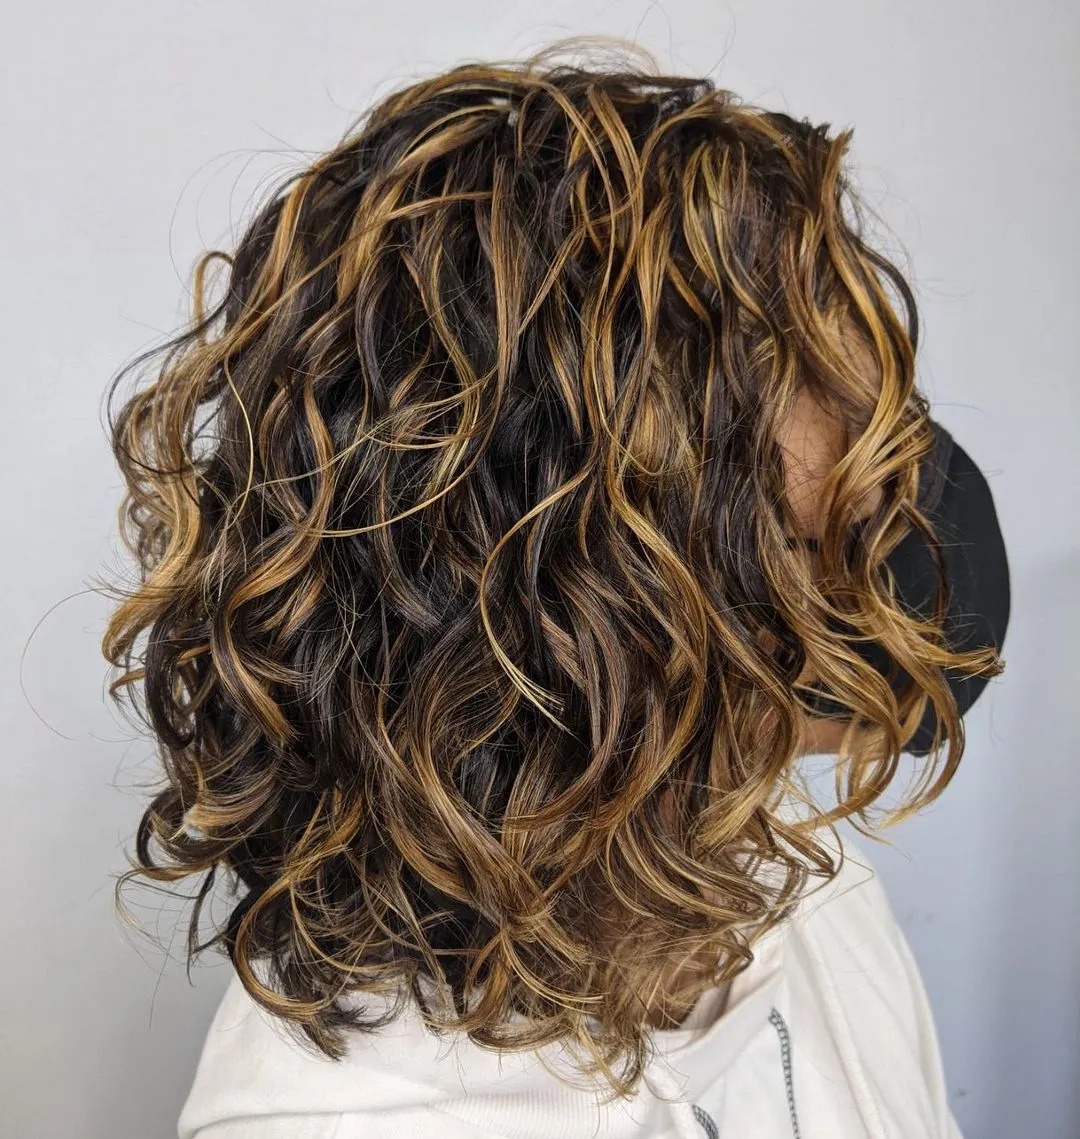
The beachy waves and loose curls hairstyle is characterized by its relaxed, undone texture that mimics the natural movement hair develops after a day spent by the ocean. Unlike structured ringlets or perfectly uniform waves, this style embraces imperfection and celebrates organic-looking texture. The key elements include soft, loose waves that vary in size, subtle bends rather than defined curls, natural-looking volume at the roots, and an overall tousled, lived-in appearance.
This versatile hairstyle works beautifully across all hair lengths, from shoulder-grazing lobs to waist-length locks, making it universally flattering and endlessly adaptable to personal style preferences.
Face Shape Compatibility Guide

Round Faces: Beachy waves and loose curls work exceptionally well for round faces by adding vertical volume and creating the illusion of length. Focus on creating height at the crown and allowing waves to frame the face softly around the cheekbones.
Oval Faces: Consider yourself lucky – this hairstyle is naturally flattering for oval face shapes. You can experiment with different wave patterns and volumes without concern, as the balanced proportions of an oval face complement the organic nature of beachy waves.
Square Faces: Soft, loose curls help soften angular jawlines beautifully. Create gentle waves that start around the ears and flow downward, avoiding too much volume at the temples which can emphasize width.
Heart-Shaped Faces: Focus on creating fuller waves from the ears down to balance a wider forehead with a narrower chin. Side-swept bangs with loose waves work particularly well for this face shape.
Long Faces: Add width with voluminous waves at the sides, avoiding too much height at the crown. Concentrate curl patterns around the mid-lengths and ends to create the illusion of width.
Hair Type Considerations

Fine Hair: The beachy waves and loose curls hairstyle can be a game-changer for fine hair, adding much-needed texture and body. Use lightweight texturizing products and focus on root lift techniques to prevent weighing down delicate strands.
Thick Hair: Your natural volume is an advantage for this style. Focus on controlling frizz and defining wave patterns rather than creating volume. Use smoothing serums and anti-humidity products to maintain the relaxed, polished appearance.
Straight Hair: Don’t let naturally straight hair discourage you – this look is absolutely achievable with the right techniques and products. You’ll need to create texture from scratch, but the results can be stunning and long-lasting with proper preparation.
Wavy Hair: You’re starting with a natural advantage. Focus on enhancing your existing wave pattern while adding definition and reducing frizz. Scrunching techniques and curl-enhancing products will be your best friends.
Curly Hair: Embrace your natural texture by loosening tight curls into relaxed waves. Use stretching techniques and smoothing products to achieve the desired loose, beachy effect while maintaining your hair’s natural body.
Essential Tools and Products
Tools You’ll Need:
- Diffuser attachment for blow dryer
- Large barrel curling iron (1.5-2 inches)
- Curling wand with no clamp
- Wide-tooth comb
- Microfiber towel or cotton t-shirt
- Hair clips for sectioning
- Spray bottle for misting
Product Categories:
- Sea salt spray for texture and grip
- Curl-enhancing cream for definition
- Heat protectant spray for thermal protection
- Texturizing mousse for volume and hold
- Light-hold hairspray for finishing
- Hair oil or serum for shine and frizz control
Method 1: The Classic Sea Salt Spray Technique

Difficulty Level: Beginner
Time Required: 15-20 minutes
Best For: All hair types, especially fine to medium density
Step-by-Step Instructions:
- Preparation Phase: Start with freshly washed hair using a volumizing shampoo and lightweight conditioner. Gently squeeze out excess water with a microfiber towel – never rub vigorously as this creates frizz.
- Product Application: Apply a heat protectant throughout damp hair, focusing on mid-lengths and ends. Follow with sea salt spray, scrunching it into your hair while your head is flipped upside down to encourage natural wave formation.
- The Scrunching Technique: Cup sections of hair in your palms and gently squeeze upward toward your scalp. This motion helps activate your hair’s natural curl pattern and distributes the sea salt spray evenly.
- Drying Process: Use a diffuser on low heat and low speed, continuing to scrunch as you dry. Alternatively, air dry for a more natural finish, scrunching periodically as your hair dries.
- Final Touches: Once completely dry, gently separate larger wave sections with your fingers to create more natural-looking movement. Finish with a light mist of texturizing spray.
Method 2: The Curling Iron Wave Creation
Difficulty Level: Intermediate
Time Required: 25-35 minutes
Best For: Straight to slightly wavy hair that needs more defined texture
Professional Technique Breakdown:
- Heat Protection: Apply a comprehensive heat protectant from roots to ends on completely dry hair. This step is non-negotiable for maintaining hair health.
- Sectioning Strategy: Divide your hair into 1-2 inch horizontal sections, starting from the nape of your neck. Clip upper sections away to work methodically through your hair.
- Curling Technique: Using a large barrel curling iron, wrap hair around the barrel leaving the ends out for a modern, undone finish. Hold for 8-10 seconds, then release the curl into your palm and allow it to cool in a spiral shape.
- Direction Variation: Alternate curl directions – wrap some sections toward your face and others away from your face. This creates the natural, random wave pattern characteristic of beachy hair.
- Cooling and Setting: Allow all curls to cool completely before touching them. This step is crucial for longevity.
- Breaking Up the Curls: Gently run your fingers through the cooled curls to soften them into loose waves. Shake your hair gently to encourage natural movement.
Method 3: The Overnight Braid Wave Method

Difficulty Level: Beginner
Time Required: 5 minutes active styling + overnight setting
Best For: All hair types looking for heat-free styling
The No-Heat Approach:
- Evening Preparation: Start with slightly damp hair – about 70% dry is ideal. Apply a curl-enhancing cream throughout your hair, focusing on even distribution.
- Braiding Technique: Create 2-4 loose braids depending on your hair thickness and desired wave intensity. Secure with soft hair ties that won’t leave creases.
- Morning Reveal: Carefully undo braids in the morning and gently separate waves with your fingers. The key is patience – rushing this step can lead to frizz.
- Enhancement: Scrunch in a small amount of texturizing cream or sea salt spray to add definition and hold to your natural-looking waves.
Seasonal Styling Adaptations
Summer Styling:
During humid months, focus on anti-humidity products and lightweight formulations. Sea salt sprays work exceptionally well in summer as they embrace the natural texture that humidity creates rather than fighting against it.
Winter Adaptation:
Cold, dry air requires more moisture in your routine. Incorporate hydrating leave-in treatments and use curl creams instead of sea salt sprays to prevent dryness while maintaining the beachy texture.
Transitional Seasons:
Spring and fall offer ideal conditions for beachy waves. Take advantage of moderate humidity levels by using lighter products and allowing for more air-drying time.
Professional Tips and Insider Secrets

Volume Creation Without Root Damage:
Create lift by blow-drying your roots with a round brush while your hair is still damp. This adds volume without the need for excessive teasing or backcombing that can damage your hair over time.
The Cooling Trick:
Always allow styled curls to cool completely in your palm before releasing them. This simple step can double the longevity of your waves by allowing the hair’s hydrogen bonds to set in their new curved shape.
Product Layering Strategy:
Apply products in thin layers rather than loading your hair with product all at once. Start with a leave-in conditioner, add heat protectant, then finish with your styling product. This prevents buildup while ensuring even coverage.
The Shake Test:
After styling, gently shake your head side to side. If your waves bounce back into place, you’ve achieved the perfect balance of hold and movement. If they fall flat, you need more texturizing product. If they don’t move at all, you’ve used too much product.
Refresh Technique:
Revive day-two waves by misting hair lightly with water mixed with a small amount of sea salt spray, then scrunching to reactivate the texture. This extends your style without complete restyling.
Maintenance and Longevity Tips
Nighttime Preservation:
Sleep with your hair in a loose, high ponytail or pineapple to preserve your wave pattern. Use a silk or satin pillowcase to reduce friction that can cause frizz and flatten waves.
Weekly Deep Conditioning:
Maintain hair health with weekly deep conditioning treatments, focusing on mid-lengths and ends where styling damage typically occurs. Healthy hair holds styles better and looks more naturally beautiful.
Regular Trims:
Schedule trims every 6-8 weeks to prevent split ends from traveling up the hair shaft. Damaged ends don’t curl properly and can make your beachy waves look raggedy rather than effortlessly chic.
Product Rotation:
Rotate between different texturizing products to prevent your hair from becoming too accustomed to any one formula, which can reduce effectiveness over time.
Professional Tips Section
Troubleshooting Common Issues:
Waves Fall Flat Too Quickly: This usually indicates insufficient product or skipping the cooling step. Ensure you’re using enough texturizing product and allowing curls to set completely before touching them.
Too Much Frizz: Over-manipulation is often the culprit. Once you’ve applied your products and created your waves, resist the urge to continuously touch and adjust your hair throughout the day.
Uneven Wave Pattern: Section your hair more carefully and ensure you’re alternating curl directions consistently. Practice makes perfect with this technique.
Lack of Volume: Focus on root lift during the drying process. Flip your head upside down while scrunching, or use clips to lift sections at the crown while air drying.
Advanced Techniques:
The Twist and Scrunch Method: Twist small sections of damp hair around your finger, then scrunch upward. This creates more defined spiral patterns within your beachy waves.
Strategic Root Clipping: While hair is drying, clip sections at the roots to create lift. Remove clips once hair is 80% dry for natural-looking volume.
Temperature Variation: If using heat tools, vary the temperature slightly between sections. Lower heat for fine or damaged hair, higher heat for coarse or resistant hair.
Frequently Asked Questions
Q: How long do beachy waves and loose curls typically last?
A: With proper technique and products, beachy waves can last 2-3 days. The key is using the right amount of hold products without weighing your hair down. Day two and three often look even better as the waves settle into a more natural pattern. To extend wear, sleep with hair loosely secured and refresh with a light mist of sea salt spray in the morning.
Q: Can I achieve this look on naturally straight hair?
A: Absolutely! Straight hair can hold beachy waves beautifully with the right preparation. Focus on creating texture from the ground up using volumizing mousse on damp hair, followed by sea salt spray. The curling iron method works particularly well for straight hair, and don’t forget to let each curl cool in your palm before releasing for maximum longevity.
Q: What’s the difference between beachy waves and regular curls?
A: Beachy waves are characterized by their irregular, organic appearance and varied curl sizes, unlike uniform traditional curls. They have a more relaxed, undone texture with softer edges and natural-looking imperfections. The waves typically start lower on the head (around ear level) rather than from the roots, creating a more effortless, lived-in appearance.
Q: How do I prevent my beachy waves from looking crunchy or stiff?
A: The key is using the right amount of product and choosing formulations that dry soft rather than crispy. Start with less product than you think you need – you can always add more. After your hair is completely dry and styled, gently scrunch out any crunchiness with your hands or run your fingers through the waves to soften them.
Q: Is this hairstyle suitable for professional environments?
A: Beachy waves can absolutely be workplace appropriate when styled with intention. For professional settings, focus on creating more polished, defined waves using curl-enhancing creams rather than heavy sea salt sprays. Ensure your waves are well-formed and frizz-free, and consider pulling back the front sections for a more structured look while maintaining the textured ends.
Conclusion: Embrace Your Effortless Beauty
Mastering the beachy waves and loose curls hairstyle is about more than just learning techniques – it’s about embracing a philosophy of effortless beauty that celebrates natural texture and confident imperfection. This versatile look has earned its place as a timeless favorite because it works with your hair’s natural tendencies rather than against them, creating styles that feel authentic and achievable.
Remember that the most beautiful beachy waves are the ones that look like they happened naturally, even when they required careful technique and quality products to achieve. Don’t aim for perfection in every wave – instead, focus on creating overall movement, texture, and that coveted “I woke up like this” vibe that makes this hairstyle so endlessly appealing.
Whether you’re preparing for a beach vacation, a casual weekend brunch, or simply want to add some effortless sophistication to your everyday look, the beachy waves and loose curls hairstyle offers endless possibilities for personal expression. Experiment with different techniques, find the products that work best for your unique hair type, and most importantly, have fun with the process.
Ready to transform your hair routine? Start with one of the beginner-friendly methods outlined above, and don’t be afraid to adapt the techniques to suit your individual hair needs. Your perfect beachy waves are just a few styling sessions away from becoming your signature look.
Internal Linking Suggestions:
- Link to “Best Hair Products for Different Hair Types”
- Connect to “Heat Protection Guide for Hair Styling”
- Reference “Seasonal Hair Care Tips and Tricks”
- Link to “Face Shape Guide for Choosing Hairstyles”
Related Keywords: loose waves tutorial, beach hair styling, natural wave techniques, curly hair methods, textured hairstyles, summer hair trends, effortless hair styling, tousled waves guide